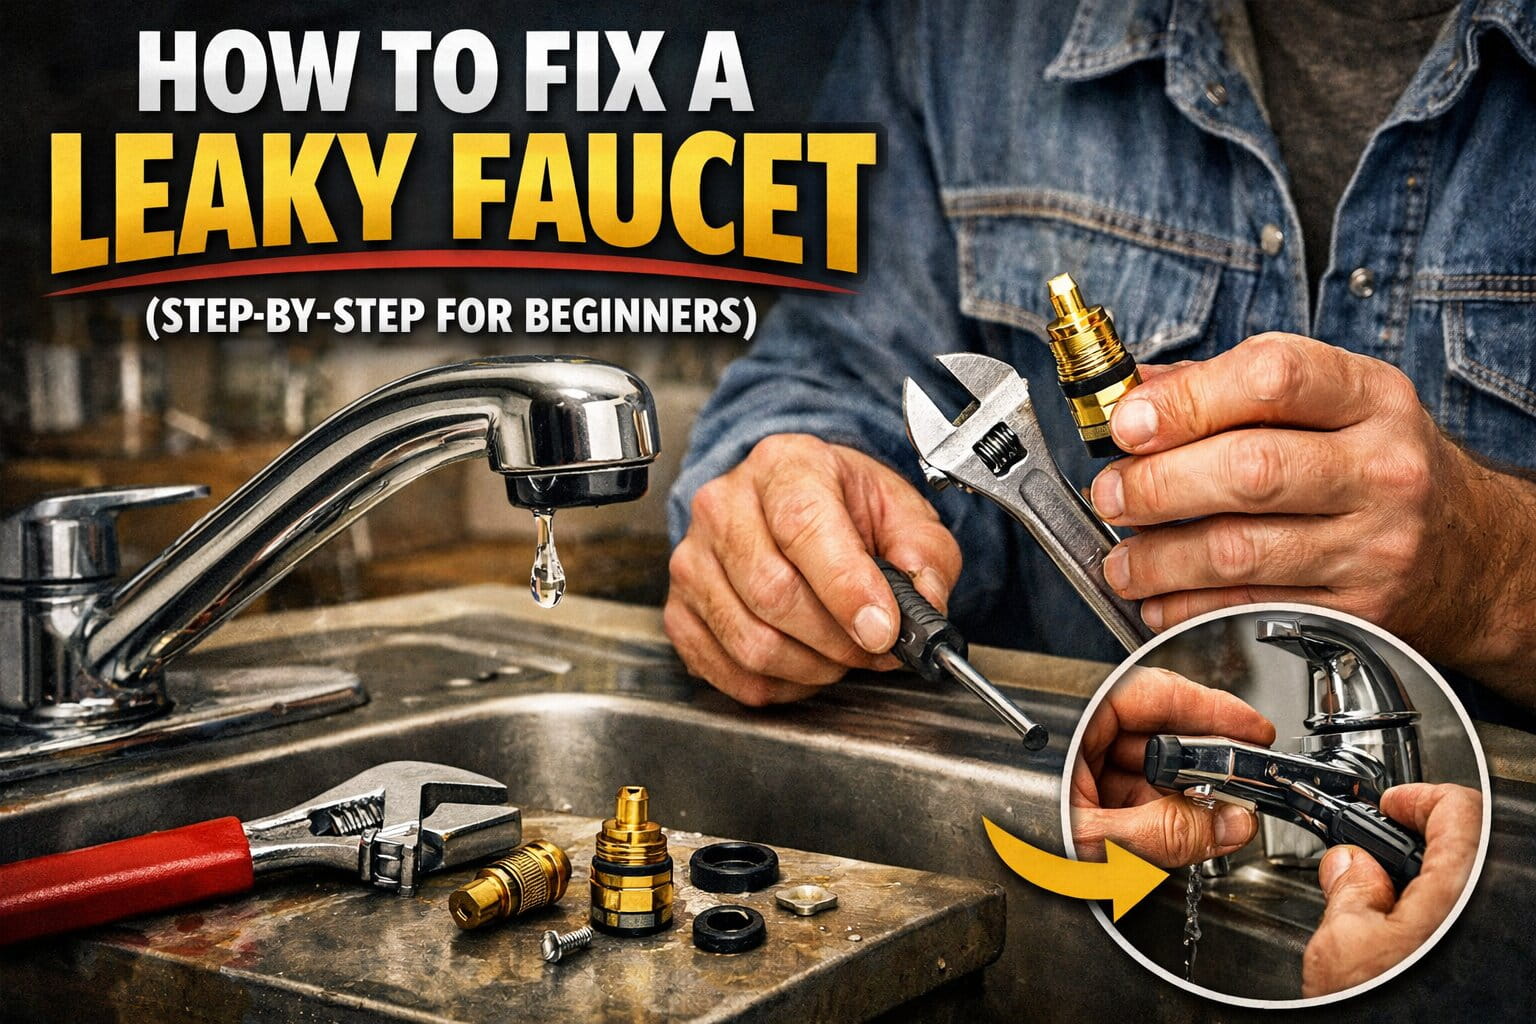
How to Fix a Leaky Faucet (Step-by-Step for Beginners)
Learn how to fix a leaky faucet step by step with this beginner-friendly guide. Save water, stop the drip, and handle a simple faucet repair at home.
A leaky faucet looks like a small problem, but it can waste a surprising amount of water over time. It can also stain your sink, create annoying noise at night, and slowly raise your water bill. The good news is that many faucet leaks are easy to fix, even if you have never done basic plumbing before.
This guide walks you through the full process in simple terms. You will learn what causes a faucet to leak, how to identify the faucet type, what tools you need, and how to repair the most common issues without making the job harder than it needs to be. By the end, you should know how to fix a dripping faucet safely and confidently.
Why a Leaky Faucet Should Not Be Ignored
Many people put off faucet repair because the leak seems minor. That is a mistake. A steady drip can waste a lot of water each month. It can also signal that a small internal part is wearing out. When one part fails, other parts may follow.
Here is why fixing a leaky faucet matters:
- It helps reduce water waste
- It can lower your utility bill
- It prevents mineral buildup around the spout
- It keeps your sink area cleaner
- It stops the constant dripping noise
- It prevents a small issue from turning into a larger repair
A quick repair today can save you money and stress later.
Common Reasons a Faucet Leaks
Before you start, it helps to know what usually causes the problem. Most faucet leaks happen because one small internal component has worn out.
The most common causes include:
1. Worn-out washer
In many traditional faucets, a rubber washer seals the water flow. Over time, it can wear down, harden, or crack. That often causes dripping.
2. Damaged O-ring
An O-ring is a small rubber ring that helps seal moving parts. If it gets loose or damaged, water may leak near the handle or base.
3. Faulty cartridge
Many modern faucets use a cartridge to control water flow. When it wears out, the faucet may drip even when fully turned off.
4. Corroded valve seat
The valve seat connects the faucet to the spout. Mineral buildup and corrosion can damage it and create leaks.
5. Loose parts
Sometimes the issue is not a broken part. A leak can happen because a nut, packing nut, or handle screw has loosened.
6. High water pressure
If your faucet only drips at certain times, especially at night, your home may have water pressure that is too high. That is a different issue from a worn-out faucet part, but it can still cause dripping.
First, Identify the Type of Faucet
You need to know your faucet type before taking it apart. Different faucets use different internal parts.
Here are the four main faucet types found in many US homes.
Compression faucet
This is the older style with separate hot and cold handles. You turn the handles by twisting them down to stop the water. These often leak because of worn washers.
Ball faucet
This type usually has one handle that moves over a rounded ball mechanism. It is common in kitchens. Ball faucets have several small internal parts and seals.
Cartridge faucet
This faucet may have one handle or two handles. It uses a cartridge inside the body to control water flow. These are very common and usually easy to repair by replacing the cartridge.
Ceramic disk faucet
This type uses a ceramic cylinder inside the faucet. It is durable, but the seals can still wear out or collect debris.
If you are not sure which kind you have, look at the handle design and how it moves. That usually gives you a good clue.
Tools and Supplies You May Need
You do not need a professional toolbox for this repair. Most beginner faucet fixes use basic household tools.
Here are the tools and supplies that help:
- Flat-head screwdriver
- Phillips screwdriver
- Adjustable wrench
- Allen wrench set
- Slip-joint pliers
- Needle-nose pliers
- Replacement washer, O-ring, or cartridge
- Plumber’s grease
- Old towel or rag
- Small bowl or tray for screws
- White vinegar for mineral buildup
- Flashlight
- Plumber’s tape if needed
A smart move is to remove the old part and bring it to a hardware store. That makes it easier to get the right replacement.
Safety and Prep Before You Start
Do not skip this part. A little prep prevents a messy mistake.
Turn off the water supply
Look under the sink for two shutoff valves, one for hot water and one for cold water. Turn both clockwise until they stop.
If your sink does not have shutoff valves or they do not work, turn off the main water supply to the house.
Turn on the faucet
After shutting off the supply, turn on the faucet to drain any remaining water. This releases pressure and keeps water from spraying when you open the faucet.
Plug the drain
Use the sink plug or stuff a rag into the drain. Small screws and parts can fall in fast. Once they do, your simple faucet repair turns into an annoying recovery job.
Protect the sink surface
Place a towel in the sink so tools do not scratch the finish.
How to Fix a Leaky Faucet Step by Step
The exact repair depends on the faucet type, but the beginner-friendly process follows the same general path.
Step 1: Find where the leak is coming from
A faucet can leak from different places:
- From the spout
- Around the handle
- From the base
- Under the sink
If water drips from the spout when the faucet is off, the internal sealing part is likely worn. If water leaks around the handle, the O-ring or packing may be the issue.
This guide focuses mainly on the most common problem, which is dripping from the spout.
Step 2: Remove the faucet handle
Most faucet handles have a decorative cap that covers the screw. Use a flat-head screwdriver to gently pry it off. Then remove the screw with the correct screwdriver or Allen wrench.
Lift the handle off carefully. If it feels stuck, do not force it too hard right away. Mineral buildup can make handles hard to remove. Wiggle gently and use a little patience.
Put all screws and small pieces in a bowl so nothing gets lost.
Step 3: Take apart the faucet body
Once the handle is off, you will see more internal parts such as a retaining nut, stem, cartridge, or cap.
Use your wrench or pliers to loosen the visible retaining piece. Wrap the metal tool with a rag first if you want to protect the finish.
As you remove parts, pay attention to the order. Set them down in sequence or take a photo with your phone. That makes reassembly much easier.
Step 4: Inspect the internal parts
Now look for obvious signs of wear:
- Cracked washer
- Flattened O-ring
- Rust or corrosion
- Broken seal
- Mineral buildup
- Damaged cartridge
If the washer looks worn, replace it. If the O-ring looks dry or split, replace it. If the cartridge is damaged or old, replace the entire cartridge.
Even if a part does not look terrible, replacing it is often the safest choice if you already have the faucet apart.
How to Repair a Compression Faucet
Compression faucets are common in older bathrooms. They are often the easiest for beginners to understand.
Step 1: Remove the handle
Take off the decorative cap, unscrew the handle, and lift it away.
Step 2: Remove the stem assembly
Use a wrench to loosen the packing nut. Pull out the stem.
Step 3: Check the washer
At the bottom of the stem, you will usually find a rubber washer held in place by a small screw. Remove the screw and inspect the washer.
If the washer looks worn, hardened, or misshapen, replace it with one of the same size.
Step 4: Check the O-ring
Inspect the O-ring around the stem. If it looks cracked or dry, replace it too.
Step 5: Reassemble the faucet
Install the new washer and O-ring, apply a small amount of plumber’s grease, and put everything back together in the reverse order.
Step 6: Test the faucet
Turn the water supply back on slowly. Run the faucet and then turn it off. If the dripping stops, the repair worked.
How to Repair a Cartridge Faucet
Cartridge faucets are common in newer homes and apartments. These are usually fixed by replacing the cartridge.
Step 1: Remove the handle
Take off the handle screw and remove the handle.
Step 2: Remove the retaining clip or nut
Some cartridge faucets have a clip that holds the cartridge in place. Others use a retaining nut. Remove that carefully.
Step 3: Pull out the cartridge
Use pliers if needed, but pull gently. Some cartridges are snug because of mineral deposits.
Step 4: Match the replacement
This part matters. Cartridges must match the faucet brand and model. If possible, bring the old cartridge to the store.
Step 5: Install the new cartridge
Insert the new cartridge in the same direction as the old one. Secure it with the clip or retaining nut.
Step 6: Reassemble and test
Put the handle back on, turn the water on, and test for leaks.
If the faucet still leaks after replacing the cartridge, the issue may be the valve body, seals, or water pressure.
How to Repair a Ball Faucet
Ball faucets are more common in kitchens and often have a single handle.
These can be harder for beginners because they contain multiple small parts, including springs, seats, seals, and a rotating ball.
Step 1: Remove the handle
Take off the screw and remove the handle.
Step 2: Remove the cap and collar
Use the correct tool or pliers to remove the cap and collar. Be gentle.
Step 3: Lift out the ball
Once the top parts are removed, lift out the ball and inspect it for wear.
Step 4: Check the seats and springs
Under the ball, you will find small rubber seats and springs. These often cause leaks when worn.
Step 5: Replace worn parts
Install new seats, springs, and seals if needed. Ball faucet repair kits are often the easiest option because they include the most common replacement parts.
Step 6: Reassemble and test
Put the faucet back together carefully and test it.
How to Repair a Ceramic Disk Faucet
Ceramic disk faucets are durable, but dirt or worn seals can still cause leaks.
Step 1: Remove the handle
Remove the handle and any decorative cap.
Step 2: Remove the cylinder
Take out the ceramic disk cylinder carefully.
Step 3: Clean the seals
Inspect the rubber seals at the bottom. Clean around them and remove debris or mineral buildup.
Step 4: Replace damaged seals
If the seals look worn, replace them.
Step 5: Reassemble and test
Put the faucet back together, restore water flow, and check the result.
What If the Faucet Still Leaks?
Sometimes the first fix does not solve the problem. That does not always mean you did something wrong.
Here are the most likely reasons:
You used the wrong replacement part
A washer that is slightly off in size can still leak. The same goes for cartridges.
The valve seat is damaged
If the valve seat is corroded, replacing the washer alone may not help.
Mineral buildup is blocking a proper seal
Hard water can leave deposits inside the faucet. Clean parts with white vinegar if needed.
The faucet is too old
If the faucet body itself is worn or corroded, replacing internal parts may not be enough.
Water pressure is too high
If dripping happens only sometimes, especially at night, pressure may be the issue rather than the faucet.
Tips to Make the Repair Easier
Beginners often struggle because of simple avoidable mistakes. These tips help.
Take photos as you go
A quick phone photo at each step can save a lot of confusion during reassembly.
Keep parts in order
Lay them out left to right in the exact order you removed them.
Do not force parts
If something is stuck, use patience, not brute force. Forcing parts can crack the handle or strip threads.
Clean while the faucet is apart
Wipe away grime and mineral deposits before putting everything back together.
Replace more than one worn part
If you already opened the faucet, replacing both the washer and O-ring is often smarter than changing only one part.
Signs You Should Replace the Whole Faucet Instead
Sometimes fixing a leaky faucet is not the best long-term move.
You may want to replace the entire faucet if:
- The faucet is very old
- The body is corroded
- Repair parts are hard to find
- The leak returns again and again
- The handle is loose and worn
- The finish is badly damaged
- The faucet has multiple issues, not just one drip
If the faucet is cheap and outdated, a full replacement may save time and frustration.
How Long Does It Take to Fix a Leaky Faucet?
For a beginner, a simple faucet repair usually takes between 30 minutes and 90 minutes.
The time depends on:
- Faucet type
- How easy the parts are to remove
- Whether you already have the replacement parts
- How much mineral buildup is inside
- Your comfort level with basic tools
If this is your first time, move slowly. Accuracy matters more than speed.
How Much Money Can You Save?
Hiring a plumber for a minor faucet leak can cost much more than doing it yourself. In many cases, the actual replacement part costs only a few dollars, though cartridges can cost more depending on the brand.
DIY faucet repair can save money in two ways:
- You avoid service labor charges
- You reduce water waste from ongoing dripping
For a beginner-friendly home repair, this is one of the best places to start.
Beginner Mistakes to Avoid
A leaky faucet repair is simple, but small mistakes can create bigger problems.
Avoid these common errors:
Forgetting to shut off the water
This is the classic mistake. It turns a small repair into a wet mess fast.
Losing tiny screws
Always plug the drain and use a small tray for parts.
Buying the wrong part
Bring the old part with you. Guessing often leads to a second trip to the store.
Overtightening everything
Too much force can damage threads or crack parts. Tight is enough. Extreme is not better.
Reassembling parts in the wrong order
This is why photos help.
Ignoring the actual leak location
Do not assume the spout leak and handle leak have the same cause. Diagnose first.
When to Call a Plumber
DIY works for many faucet leaks, but not all of them.
Call a plumber if:
- You cannot shut off the water properly
- The faucet is stuck and will not come apart
- The valve seat is badly damaged
- The leak is coming from inside the wall
- You see water under the sink with no clear source
- The shutoff valves under the sink are leaking too
- You tried replacing parts and the problem remains
There is no shame in stopping when the repair moves beyond a beginner job.
Frequently Asked Questions
Can I fix a leaky faucet without replacing parts?
Sometimes you can stop a minor leak by tightening a loose nut or cleaning mineral buildup. But in most cases, the fix requires replacing a worn washer, O-ring, or cartridge.
Is a dripping faucet an emergency?
Usually no. But it should still be fixed soon. A steady drip wastes water and can get worse over time.
How do I know what replacement cartridge I need?
Take the old cartridge to a hardware store. Matching it by sight or part number is the easiest method.
Why does my faucet still drip after I replaced the washer?
The problem may be the valve seat, the wrong washer size, mineral buildup, or a different worn internal part.
Can one faucet leak increase my water bill a lot?
Yes. A constant drip adds up over weeks and months.
Final Thoughts
Learning how to fix a leaky faucet is one of the most useful home repair skills for beginners. The job is usually simple, low-cost, and manageable with basic tools. In many cases, the real cause is just one worn part inside the faucet. Once that part is replaced, the drip stops.
Start by identifying your faucet type. Shut off the water. Take the faucet apart carefully. Inspect the worn components. Replace the damaged part with the correct match. Then reassemble and test. That is the basic formula.
Do not rush the process. Small repairs go better when you stay organized and work step by step. Once you fix your first dripping faucet, you will probably feel much more confident handling other easy repairs around the house too.
Related Articles
Bathroom Makeover Ideas on a Budget (DIY Guide)
Apr 19, 2026Best DIY Kitchen Upgrades Without Remodeling
Apr 19, 2026How to Paint a Room Like a Pro (Step-by-Step Guide)
Apr 19, 2026Easy DIY Projects to Increase Your Home Value
Apr 19, 2026DIY Home Renovation Ideas on a Budget (2026 Guide)
Apr 19, 2026Get Updates
Subscribe to get the latest articles delivered to your inbox.